Tutorials
How to make a watercolour cake – Tutorial
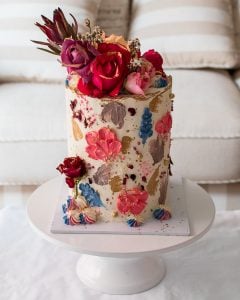
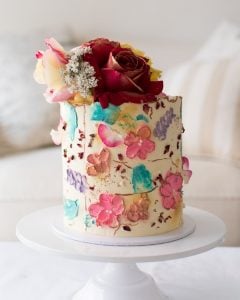
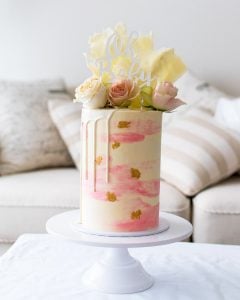
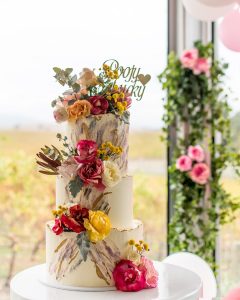
Since I had this tutorial all ready to go, I thought why not start the blog with how to decorate a cake using watercolour technique because who doesn’t want to learn this popular design that is being used by cake artists around the world! If you want to make a cake, try this easy and fun method! I guarantee you will LOVE IT!
Now, if you are on Instagram I am sure you are aware of how this watercolour technique has been a very trendy design in the cake world and most of the watercolour cakes you see on Instagram are done using buttercream by cake designers. So, today I will be teaching you guys how to design a cake in an easy and a fun way that can be done by literally anyone!!! Even kids can do a good job because you can’t go wrong with it.
To me, I always love using buttercream and would choose that over fondant on any day, so it’s only natural that I do this technique using buttercream. Now, when I say buttercream, there are few different types and you can decide which one is more suitable to you but the easiest option the American buttercream and that is what I have used in this tutorial (It is my favourite!).
Here’s the pros and cons of the three types of buttercream:
| TYPE | PROS | CONS |
| American Buttercream | Easy/quick to make. Cheaper option. Thicker consistency. | Not a good option if you don’t have a sweet tooth. Moe susceptible to melting. Adding too much colouring can separate the mixture. |
| Swiss Buttercream | Smooth/shiny finish. Easy when playing around with colouring. Not too sweet. | More pricey (requires a lot of egg whites – waste egg yolks) Long process. Difficult to get it consistent every time for beginners. |
| Italian Buttercream | Perfect for people who don’t like sweets. Smooth/shiny finish. | Costly (eggs). Longer process. Very difficult for beginners. |
Step 1: Frost the entire cake in buttercream
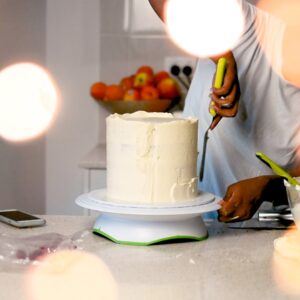

Place you cake on a turntable (if you don’t have this, IT IS OKAY!) – just place it on your bench and make sure you can turn the board around without it sticking to the kitchen bench. When I just began decorating, I placed my cake on a another bowl so I could hold the cake board and turn it around more easily but this is a very risky move!
Frost your entire cake with buttercream in any colour of your choice. I chose my base colour to be white because that gives me more room to play around with any colour combination.
Step 2: Refrigerate the cake until it sets (30mins – 1hour)
I like to refrigerate my cakes after frosting with the base colour before actually attempting the watercolour technique because the more set your base buttercream is, the easier it is to play around with the other colours without messing up your base. Usually 30 minutes – 1 hour is more than enough to let any of the buttercream types to set in the refrigerator.
Step 3: Make your favourite colours
While the cake is resting, you don’t have to because you can start on picking your colour combination and then divide you leftover buttercream into very small batches (you won’t need as much as you think for each colour – I always have leftover colours). I would usually recommend 1-2 tablespoons of buttercream for each colour.
When using colours, it is always recommended to use gel colours that can be bought from any cake store in comparison to edible colours you can buy at grocery stores because these are often too watery which can ruin the consistency of your buttercream mixture.
Mix your colours to the small amount of buttercream mixture and leave it outside so that it will have a softer consistency compared to your cake in the refrigerator – this makes it easy for you to spread the coloured buttercream on the hard surface.
Step 4: Use a small spatula and spread each colour one at a time


As you can see in the video (You can find the video at the end of the post), I used a much smaller spatula to spread the coloured buttercream but if you don’t have a small spatula, don’t worry!!! Grab a butter knife and spread each colour one at a time. I did it one at a time because I didn’t want all the colours to start blending and mixing together and I only have one small spatula. However, if you are fine with it go ahead and do that! Otherwise, you can use different butter knives for each colour and spread it as you please.
The easiest way to achieve a perfect watercolour look is to add a blotch of coloured buttercream on the surface and hold the spatula (or butter knife) flat against the cake while you slowly spin to spread it until you are satisfied. This stage is a personal choice so for any guidance, please refer to the video 🙂
Step 5: Overlap and slowly blend until you’re pleased with the look


Even though I don’t like to blend my colours together before spreading on the cake, I am a huge fan of overlapping colours and if I feel like it I may just let the colours blend a tad bit when spreading it on the cake (to me this looks better but it is again a personal choice – feel free to do what you like). This ends up leaving a beautifully mixed set of colours creating a perfect watercolour effect.
TIP for American buttercream users: if you want a really smooth and shiny surface, you can still achieve this by simply dipping your spatula in hot water before smoothening your buttercream on the cake.
GO GIVE THIS A TRY!!!
GOOD LUCK FAM, YOU GOT THIS!
Follow us on our instagram for more videos and content: Ruwiscakes


